Managing money as a student can be difficult. Between college fees, transportation, food, books, subscriptions, and personal expenses, small purchases can quickly add up. Without tracking your spending, it may become difficult to understand where your money goes each month.
Microsoft Excel can help you organize your income and expenses in one place. You do not need advanced Excel knowledge to create a useful budget tracker. With a simple table and a few formulas, you can calculate your total spending, compare expenses, and plan your monthly budget.
In this guide, you will learn how to create a student expense tracker in Excel step by step, including useful formulas and formatting tips.
1. Create a New Excel Worksheet
Open Microsoft Excel and create a blank workbook. Rename the first worksheet to Monthly Expenses so that you can identify it easily.
In the first row, enter these column headings:
| Column | Heading | Purpose |
|---|---|---|
| A | Date | Records when you made a payment. |
| B | Category | Identifies the type of expense. |
| C | Description | Explains what you purchased. |
| D | Payment Method | Records cash, card, UPI, or another method. |
| E | Amount | Stores the expense value. |
These columns provide a basic structure for recording your daily spending. You can add more columns later if you want to track payment status, receipts, or additional details.
2. Enter Sample Student Expenses
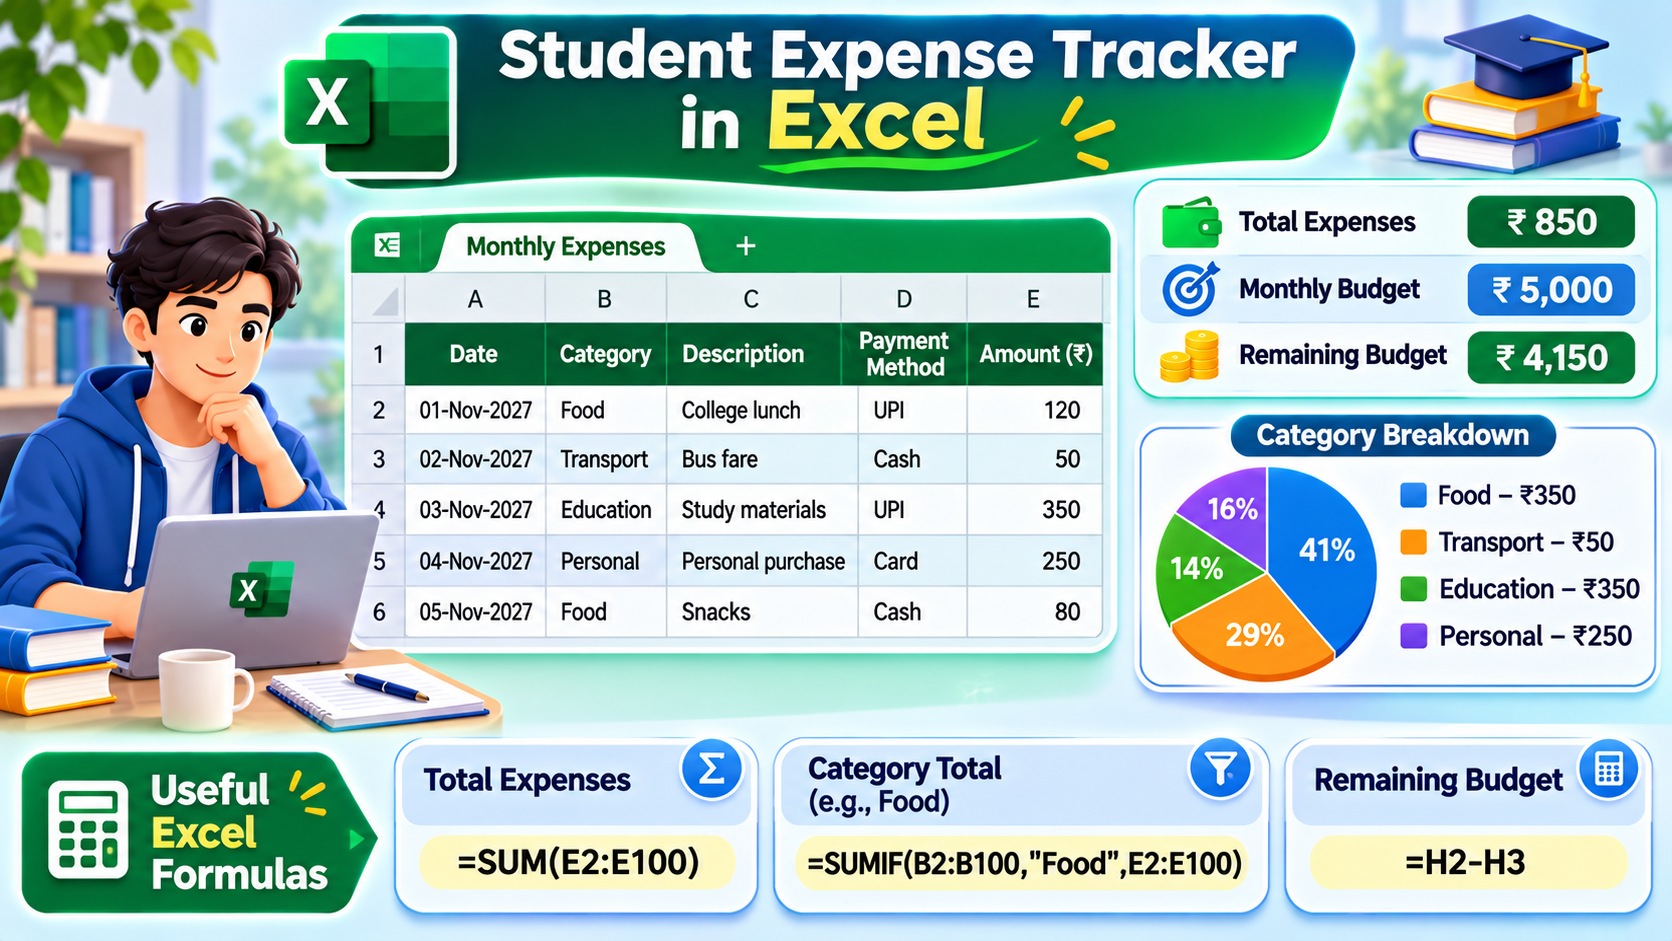
After creating the headings, enter a few expenses to understand how the tracker works. Use the following example as a starting point.
| Date | Category | Description | Payment Method | Amount (₹) |
|---|---|---|---|---|
| 01-Nov-2027 | Food | College lunch | UPI | 120 |
| 02-Nov-2027 | Transport | Bus fare | Cash | 50 |
| 03-Nov-2027 | Education | Study materials | UPI | 350 |
| 04-Nov-2027 | Personal | Personal purchase | Card | 250 |
| 05-Nov-2027 | Food | Snacks | Cash | 80 |
The amounts above are sample values. Replace them with your actual expenses and use a consistent currency format throughout the worksheet.
3. Calculate Total Expenses Using SUM
The SUM function adds multiple numbers. It is one of the most useful Excel formulas for a budget tracker.
Suppose your expense amounts are entered in cells E2 through E100. Select an empty cell where you want to display the total and enter:
=SUM(E2:E100)
Press Enter. Excel will calculate the total of all amounts in that range. Whenever you add another expense within the selected range, the total will update automatically.
4. Calculate Expenses by Category Using SUMIF
Knowing your total spending is useful, but understanding which categories consume the most money is even more helpful.
The SUMIF function adds amounts that match a particular condition. For example, to calculate all food expenses, use:
=SUMIF(B2:B100,"Food",E2:E100)
This formula checks column B for the category Food and adds the matching amounts from column E.
You can create a small summary table like this:
| Category | Formula |
|---|---|
| Food | =SUMIF(B2:B100,"Food",E2:E100) |
| Transport | =SUMIF(B2:B100,"Transport",E2:E100) |
| Education | =SUMIF(B2:B100,"Education",E2:E100) |
| Personal | =SUMIF(B2:B100,"Personal",E2:E100) |
Make sure the category names in your summary match the names entered in your expense records.
5. Track Your Monthly Budget
To understand whether you are staying within your budget, create a separate summary section.
For example, enter these labels and values:
- Monthly Budget: ₹5,000
- Total Expenses: Link this to your SUM formula result.
- Remaining Budget: Calculate the difference between your budget and expenses.
If your monthly budget is in cell H2 and your total expenses are in H3, enter this formula in H4:
=H2-H3
A positive result means you have money remaining within your planned budget. A negative result means your recorded expenses have exceeded it.
6. Format Your Expense Tracker
Good formatting makes your worksheet easier to read and maintain. Apply these simple improvements:
- Make the heading row bold and use a contrasting background color.
- Format the Date column as a date.
- Format the Amount column as currency.
- Adjust column widths so that descriptions are readable.
- Use borders to separate the headings and expense records.
- Freeze the top row so that column headings remain visible while scrolling.
You can also select your expense data and use Insert > Table to convert it into an Excel Table. This makes filtering and sorting easier, and the table can expand as you add new records.
7. Add a Chart to Understand Your Spending
A chart can make your spending patterns easier to understand. Once you have calculated expenses by category, select the category summary table and choose Insert from the Excel ribbon.
Consider these chart options:
- Pie Chart: Shows how your total expenses are divided among categories.
- Column Chart: Compares spending across different categories.
- Line Chart: Helps you observe changes in spending over time when you have dated summaries.
Choose a chart that makes the information easy to interpret. Avoid adding too many charts to a simple expense tracker.
8. Useful Excel Functions for Student Budgeting
After creating your basic tracker, you can use additional Excel functions to make it more useful.
| Function | Example Formula | What It Does |
|---|---|---|
| SUM | =SUM(E2:E100) |
Adds expense amounts. |
| AVERAGE | =AVERAGE(E2:E100) |
Calculates average recorded spending. |
| MAX | =MAX(E2:E100) |
Finds the highest expense. |
| MIN | =MIN(E2:E100) |
Finds the lowest expense. |
| COUNT | =COUNT(E2:E100) |
Counts cells containing numbers. |
| SUMIF | =SUMIF(B2:B100,"Food",E2:E100) |
Adds expenses matching a category. |
Practice these formulas with sample data before using them for your personal budget. Understanding how each function works will also improve your general Excel skills.
Common Mistakes to Avoid
- Forgetting small purchases: Record everyday expenses instead of tracking only large payments.
- Using inconsistent category names: Choose standard names such as Food, Transport, Education, and Personal.
- Entering amounts as text: Make sure expense values are stored as numbers so formulas can calculate them.
- Not updating the tracker: Add expenses regularly rather than trying to remember everything at the end of the month.
- Ignoring the budget summary: Review your spending periodically and adjust your plans when necessary.
Conclusion
Creating a student expense tracker in Microsoft Excel is a simple way to develop better budgeting habits and improve your spreadsheet skills. By using basic functions such as SUM and SUMIF, you can calculate total expenses and understand how your money is distributed across different categories.
Start with a basic worksheet, record your spending consistently, and add charts or other features as your needs grow. The same Excel skills can also help you with academic assignments, internships, and future workplace tasks.
Explore ProjectDuniya for more student learning resources, tutorials, and practical technology guidance.